How to maximize MUA portfolio photos using iPhone 11 Pro: Professional & Selling Results!
As a Makeup Artist (MUA), portfolio is the main “weapon” to attract clients. However, often the makeup that is already beautiful on the model's face actually looks “ordinary” or even cakey when photographed. The problem is not makeup-but on the photography technique.
The good news is that you don't need an expensive DSLR camera. iPhone 11 Pro has a triple camera system that is highly capable of producing studio-quality portfolio photos. Check out this complete guide to maximizing your iPhone 11 Pro to make your MUA photos look professional and expensive!
1. Use the Right Lens (Avoid Excessive Wide-Angle)
The iPhone 11 Pro has three lenses: Ultra Wide, Wide, and Telephoto. For beauty photos (beauty shots):
- Use a Telephoto Lens (2x): This is the key to keeping the model's facial proportions from looking wide (distorted). A 2x lens provides a compression effect that makes the facial features look more proportional and elegant.
- Avoid Digital Zoom: Do not pinch the screen to zoom in. Always click the icon “2” on the camera screen for the sharpest results.
2. Maximize Portrait Mode with “Studio Light”
Features Portrait Mode on the iPhone 11 Pro goes beyond making the background blur.
- Select Studio Light: After entering Portrait Mode, slide the circle below to the option Studio Light. This feature subtly brightens areas of the model's face, giving the effect as if you were using additional lights.
- Set the Depth (f-number): Click the “f” icon in the top right corner. Don't blur too much (small numbers), set it around f/4.5 or f/5.6 to keep the hair strands and earring details sharp but the background neat.
3. Set Manual Focus and Exposure
Don't let the camera decide for itself which parts to light.
- Tap on Eye: Always tap the screen right at the model's eyes to lock focus.
- Lower Exposure: After tapping, a sun icon appears. Slide it down a little. A slightly dark (but not dim) photo that retains texture details eyeshadow and highlighter better than overexposed photos (overexposed).
4. Lighting is Key (Lighting 101)
The iPhone 11 Pro is very good at capturing details, but needs sufficient light.
- Natural Light: Photograph near a large window in the morning or evening (8am - 10pm).
- Ring Light or Softbox: If indoors, use Ring Light right in front of the model. However, make sure that the light does not “take away” the dimensions of the face. Use medium intensity to keep the skin texture looking healthy.
5. Secret Camera Settings for Sharp Details
Enter Settings > Camera on your iPhone, then make sure this setting is active:
- Format: Choose High Efficiency for the best quality.
- Smart HDR: Enable. This helps iPhone balance the dark and light areas in makeup photos.
- Grid: Activate Grid. Use these auxiliary lines to ensure that the model's face is centered or in line with the rules. rule of thirds.
6. Lens Cleanliness (Simplest but Often Forgotten)
Before shooting, always wipe your iPhone camera lens with a microfiber cloth. Fingerprints stuck to the lens will make the photo look foggy or , which makes the makeup look unclean.
Bonus Tip: Thin-Thin Editing
Don't use filters that change the original color of the makeup. Use the “Edit” iPhone built-in for:
- Brilliance: Turn it up a little to give it a “glow”.
- Sharpness: Turn it up a little (10-15) to make the lash details stand out more.
- Saturation: Adjust just enough to make the lipstick color look like the original.
The iPhone 11 Pro is still very relevant for creating a MUA portfolio that sells in 2025. With the lens Telephoto, With the right lighting and manual focus settings, you can create photos that look like they were taken by a professional photographer.
Recommendations for additional lighting equipment that is affordable but provides maximum results
Without proper lighting, even the most sophisticated camera will struggle to capture details makeup. Here are 3 must-haves for MUAs:
1. 18 Inch Ring Light (Main Light)
Don't buy ring light that are too small (10-12 inches in size) as the light is not evenly distributed over the face.
- Why this: Ring light The large size creates a beautiful “halo” effect or white circle in the model's pupil (catchlight). Place at eye level, avoiding too harsh light.
- Tips: Look for one that features Bi-Color (adjustable from yellow/warm to white/cool). For photos makeup, use ambient color temperature 5500K (neutral white) so that the color foundation unchanged.
- Recommendation: Brands like Midio, Mixio, or Inbex usually offers affordable prices (200-400 thousand) including a tripod.
2. Mini LED Panel or “Fill Light”
If ring light is the main light from the front, you need one small light from the side.
- Why this: Using only one headlight often makes the face look “flat”. Small lights from the side help to accentuate texture highlighter and cheekbone dimensions.
- Tips: Choose a portable LED that runs on batteries for easy movement without messy cables.
- Recommendation: Ulanzi VL49 or Ulanzi VL120. It's pocket-sized but very bright.
3. 2-in-1 Reflector (Silver & Gold)
This is the cheapest but most powerful tool for removing dark shadows under the chin or nose.
- Why this: This tool does not require electricity. Place it on the model's lap or under the chest when shooting. The light from the top lamp will bounce upwards and fill in the shadow areas on the neck and under the eyes.
- Tips: Use the side Silver for clean and bright results, or the Gold if you want makeup results bronzy or warm.
Comparison of Light Effects
| Type of Light | Results on iPhone 11 Pro Photos |
| Room Lights Only | Yellow, noisy, and dull-looking photos. |
| Ring Light Only | The face is bright, but sometimes looks a little “flat”. |
| Ring Light + Side LED | Results look 3D, detailed shimmer and eyeshadow looks “broken” (sharp). |
A guide to the most effective model poses to highlight eye makeup or complexion details for your portfolio
Photographing the result makeup should not be careless. The slightest wrong angle can make the model's face look asymmetrical or detailed. eyeshadow invisible.
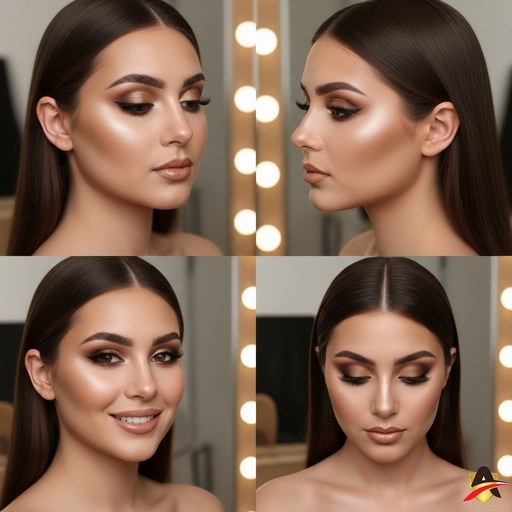
Here are the guidelines 4 Favorite Poses for MUA portfolios that you can practice directly using the iPhone 11 Pro:
1. “The Glam Close-Up” Pose (Eye & Eyebrow Focus)
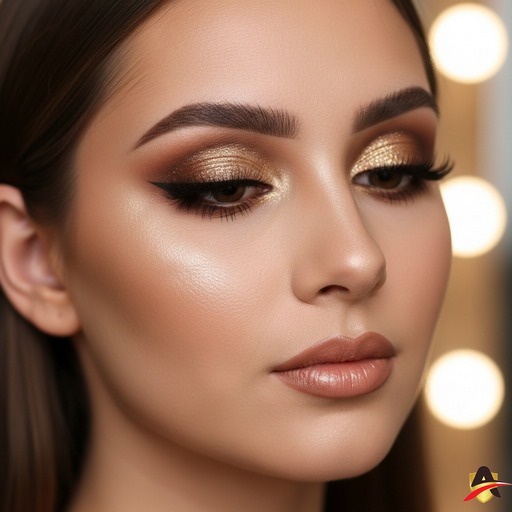
Use lenses Telephoto (2x) for this pose so that there is no distortion of the nose.
- Model Instruction: Have the model turn her head slightly (3/4 of the face), eyes looking towards the camera but eyelids slightly lowered (half closed).
- Objective: Accentuate gradation details eyeshadow, eyelash neatness, and blending eyebrows.
- iPhone Tips: Make sure the focus is locked on the lashes closest to the lens.
2. “The Side Profile” Pose (Eyeliner & Contour Focus)
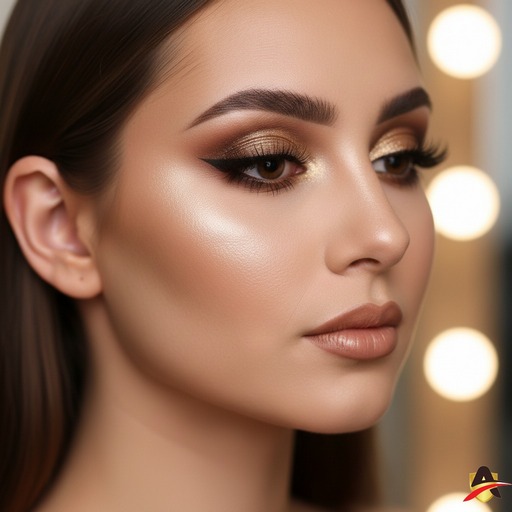
Posing from the side is the best way to show your skills contouring and sharpness eyeliner.
- Model Instruction: The model turns her head to the side until only one eye is clearly visible. Have the model lift the chin slightly so that the jawline (jawline) looks firm.
- Objective: Showing highlighter on cheekbones and precision wing eyeliner.
- iPhone Tips: Use Portrait Mode so that the background looks blurry and the model's face really “pops”.
3. “Soft Smile & Direct Look” Pose (Complexion Focus)

This is the most standard pose but sells the most because clients want to see the full face.
- Model Instruction: Face straight into the camera, shoulders slightly tilted. Smile slightly without showing your teeth so that your cheek muscles don't rise too much (which can ruin the look). blush).
- Objective: Indicates that foundation looks smooth (flawless), lip symmetry, and application blush.
- iPhone Tips: Ensure lighting from Ring Light right in front of the face to eliminate under-eye shadows.
4. “The Looking Down” Pose (Focus Cut Crease/Glitter)
If you create a technique makeup complicated eyes such as cut crease or use multiple glitter.
- Model Instruction: The face is facing the camera, but the eyes are looking downwards (towards the hands or floor). Make sure the model does not lower her head, only her eyes.
- Objective: Showing the entire eyelid area without any creases. This is an “aesthetic pose” that is very popular on Instagram.
Tips to Keep the Model from Getting Stiff
- Use Music: Play music in the studio for a more relaxed atmosphere and the model can follow the beat.
- Mirroring: Give instructions with your hands (e.g. “Let's turn to the left slightly to follow my hand”).
- Give Praise: Say “Good!”, “Beautiful!”, or “Hold on!” when you get the right angle. A confident model will result in a more lively photo.
Final Checklist Before Posting
Before these beautiful photos hit Instagram/TikTok:
- Check if there are fine hairs (stray hair) that covers the face.
- Check if the lipstick is a little messy on the edges.
- Use features “Auto Enhancement” (magic wand icon) in the iPhone photo app if you want the colors to “pop” a little more automatically.
Instagram captions that are interesting and contain keywords (SEO) so that your MUA services are easier for prospective brides to find.
some options caption Instagram that has been optimized with SEO techniques (using keywords that are often searched by prospective clients) and has high marketability (copywriting).
You can choose according to vibe the result of your makeup:
Option 1: Focus on Quality (For Brides-to-be/Wedding)
Suitable for flawless, elegant and timeless makeup results.
Caption: “A great makeup look is an investment for photos that will last a lifetime. ✨
Details complexion smooth and eye makeup speaking is my priority for every client. The secret? Proper blending techniques and quality products to keep makeup ‘on’ all day without feeling heavy.
Ready to look stunning on your special day? Slots for [Mention Month/Year] are running out. Click the link in bio for consultation and booking! 🕊️
#MUA[Name Your City] #MakeupArtistJakarta #WeddingMakeupIndonesia #MUAProfessional #MakeupBride #MakeupFlawless #iPhone11ProPhotography #BridalLook #WisudaMakeup”
Option 2: Focus on Texture & Details (For Close-up Portfolio)
Suitable for photos that feature eyeshadow, glitter, or eyeliner.
Caption: “Zoom in for the details! 🔎✨
There is a certain satisfaction in seeing the gradation eyeshadow and shimmer that blends in perfectly. Makeup is not about covering up, but accentuating the best features of your face.
Taken using the iPhone 11 Pro camera without any over-filters, as I want you to see the original texture that remains smooth and clean.
If you like this ‘Bold but Clean’ look, please comment below! 👇
#CloseUpMakeup #DetailMakeup #MUAIndonesia #EyeshadowLook #MakeupTutorial #MUAHits #MakeupInspiration #BeautyShoot #MakeupJamanNow”
Option 3: Short, Concise, & Aesthetic (Youth/Graduation Style)
Suitable for Gen Z target audience or graduation/party clients.
Caption: “Confidence level: Upgraded by [Your MUA Name] 💄✨
You don't need a filter if your makeup is this clean. Fresh, glowing, and ready to party! Book your glam session now via link in bio! 💌
#MUA[CityName] #MakeupGraduation 1TP5EngagementMakeup #PartyLook #MakeupGlow #MUAJakarta #SelfieReady #MakeupArtist”
Instagram SEO Tips to Get Found Easily:
- Use Alt Text: Before posting, click Advanced Settings > Write Alt Text. Write a description of the photo, for example: “Jakarta Makeup Artist for Wedding and Graduation with flawless results.”
- Use Location Tags: Always tag the specific location (e.g. “Senayan City” or “Bandung”) not just the city, so that it shows up in local searches.
- Keywords in Username/Bio: Make sure to include the word “MUA” or “Makeup Artist” in your account name or bio.
Reels video content idea to show cinematic Before-After process with iPhone 11 Pro
Creating cinematic video reels doesn't have to be complicated. iPhone 11 Pro features 4K Video and Cinematic Stabilization which is very stable. Video Before-After is the type of content that brings in clients the fastest because it proves your skills in real life.
Here are 3 Reels concept ideas that are aesthetic and sellable:
1. “The Magic Brush” concept (Quick Transition)
This concept is very popular because it gives an instant surprise effect.
- How to Record: * Clip 1: In the bareface model, you swing the brush (like a powder brush) towards the camera lens until the screen is covered with brush bristles.
- Clip 2: Model already full makeup, You start the recording with the brush covering the lens, and then pull it away from the camera.
- Editing: Cut the video right when the lens is completely covered. As a result, when the brush passes by, the model's face instantly turns beautiful.
- iPhone Tips: Use resolution 4K at 60fps to make the transition look very smooth.
2. The Cinematic Reveal (Slow Motion) Concept
Suitable for highlighting luxury (luxury look) of your makeup results.
- How to Record: * Use the Slo-Mo on the iPhone 11 Pro.
- Have the model close her eyes, and then slowly open them with a slight smile.
- Perform camera movements pan (gently slide) from the side of the face towards the front.
- Editing: Add music that dreamy or elegant. Pair it with a clip of the product details (lipstick or palette used).
- iPhone Tips: Use side lighting so that the dimensions of the face look deeper in slow videos.
3. The concept of “Process vs Result” (Education & Trust)
Show that you work hygienically and professionally.
- How to Record: * Collection of short clips (1-2 seconds) while you perform skin prep, putting on eyelashes, and applying lipstick.
- Use features Time-lapse briefly while you are applying makeup to show the speed of work.
- Close with the final look taken from an angle. low angle to make the model look “expensive”.
- Editing: Use features Sync with Beat in an editing app (such as CapCut or Instagram Reels) so that each piece of video follows the beat of the music.
Technical Tips to Make Video Reels Look Crystal Clear:
- Focus Lock (AE/AF Lock): Before recording, press and hold the screen on the eye of the model until the yellow “AE/AF LOCK” appears. This prevents the camera from “pulsing” or changing focus when you move.
- Turn off HDR Video (if necessary): Sometimes HDR videos look too bright when uploaded. If the upload looks strange, try turning off the Settings > Camera > Record Video > Smart HDR.
- Use Trending Audio: Use songs that are trending on Instagram (look for the up arrow icon in the music section) for a wider reach.
Example of On-Screen Text Structure:
- Seconds 1-2: “POV: You found the right MUA for your big day 👰✨”
- Final seconds: “Available for [Month] booking! Click link in bio 💌”